Our Acceleration Graph
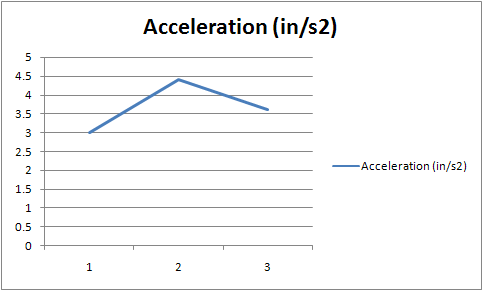
This is our acceleration graph and once again it was measure in inches/seconds. This range however isn't all that spread out like our velocity was and this time our highest is 4.4 in/s while our lowest is 3 in/s. Its not a wide margin, but as you can see, with less velocity less acceleration was used. We think that the acceleration went down because the car turned slightly. Once the car turned it caused more friction therefore slowing down the car and making it stop faster.
Our Velocity Graph
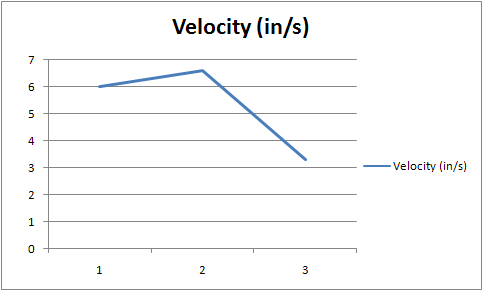
This is our Velocity Graph, as you can see, we did three trials and we think it worked out pretty well. The velocity is measured in inches/seconds so we didn't really move all that much if you think about it. Our highest velocity was 6.6 in/s while our lowest was 3.3 in/s which is quite a range there. When the velocity reached its highest, it was noted that the car went straight. This caused less friction which made the car go on longer.
Rat Trap Car Diagram #5
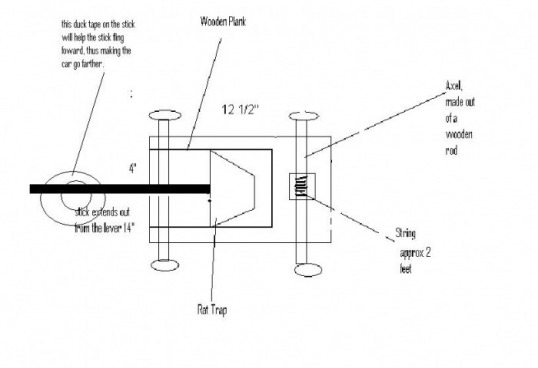
Here we put the duck tape on the end of the stick, making the car fling farther. We thought that with more weight dangling on the stick, it would pull the car onward and it works to an extent. With less bounce, the car was able to move forward rather than in the air, therefore sealing the deal.
Rat Trap Car Diagram #4
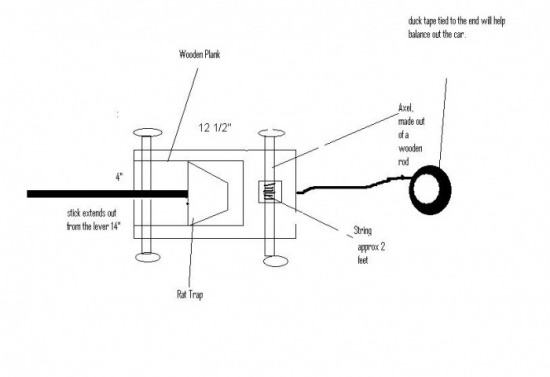
We replaced the hammer with duck tape tied to the end of the string. The duct tape roll weighed less than the hammer but more than the wooden spoons making it an easy compromise. When we had the duct tape rolling behind it, it created more weight at the back stopping the hop entirely, but we had two different sizes of the roles. The first size was too big and held too much weight and caused the car to flip because it needed much more force than the rat trap to move (Newton's 2nd Law). The smaller roll of duct tape was used only as a weight and it was perfect letting the car move without the bounce.
Rat Trap Car Diagram #3
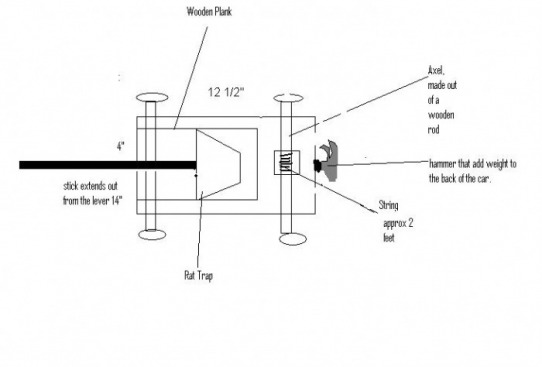
This is our third diagram for modifications. We thought the spoons were not enough weight, so we added a hammer. Everything else stayed the same. All we were trying to do was stop the bounce, which was caused because of too much weight on the front, so we taped a hammer underneath. The hammer weighed WAY too much and it didn't budge at all!
Rat Trap Car Diagram #2
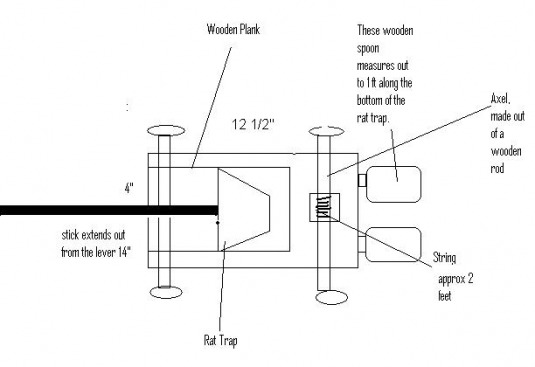
This is our diagram for our rat trap car's first modification. The stick will help pull the sting better, helping the car move. The spoons add weight to the back, helping it balance out and not jump.
